Variations
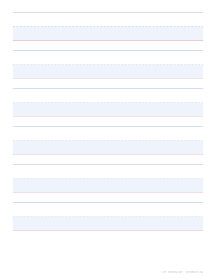
What prints with the starting settings
| Paper | US Letter — 215.9 × 279.4 mm (8.5 × 11 in) |
|---|---|
| Writing height (top to baseline) | 28 mm = 1.102″ |
| Writing sets on this page | 6 |
| Midline (x-height) | 0.551″ |
| Margins | 1/2″ |
| Line weight | 0.25 mm (bold 0.35 mm) |
| Print setting | Scale 100% / Actual size |
Sized for the brush, not the pencil
Brush lettering works by contrast: press down for a thick downstroke, ease off for a hairline upstroke. That contrast needs room. On ordinary handwriting paper a big brush tip fills the whole set in one stroke and there is no space left for the thin parts. These sheets use a 28 mm writing height with the dashed midline at 14 mm, so a capital or an ascender reaches roughly 2.8 cm tall and a lowercase letter has a full 14 mm band to swell in.
The x-height zone is tinted pale blue. Most of your practice drills, from underturns and overturns to compound curves and ovals, happen inside that band, and the tint makes it obvious when a stroke drifts out. A 10 mm gap separates each set, so long flourishes on capitals have somewhere to go.
Portrait, landscape and pen size
Portrait suits drill pages: a row of one stroke repeated across the page, then the next. Switch to landscape when you practise words and short quotes, where a longer line matters more than more lines. For fine-tip brush pens the 20 mm variation is easier to fill; save the full size for large brush pens and water brushes.
Modern brush lettering is often written upright or with only a slight lean. The 85° slant guides keep that small lean consistent without pushing you into a formal script. For a steep pointed-pen hand, use the copperplate sheets instead.
A simple drill order
Most brush lettering practice begins with the basic strokes before any letters: thin upstrokes, thick downstrokes, overturns, underturns, compound curves, ovals and ascending and descending loops. Fill a row with each one, keeping every downstroke the same weight. Then combine them into letters, and the letters into short words such as “minimum”, which uses almost nothing but those strokes.
Printing tips
Print at 100% and choose the best quality setting so the shading prints smoothly. On an inkjet, let the sheet dry for a minute before lettering over it or the tint can smear. If you plan to reuse one guide, print on plain paper and lay marker or tracing paper over it; the shaded band shows through well. For finished pieces on card, the bordered blank page gives you a clean frame to letter into.
More handwriting sheets
- First grade writing paper (3/4 inch lines)
- Kindergarten writing paper (1 inch lines)
- Cursive handwriting paper with slant lines
- Primary story paper
- Third grade handwriting paper (1/2 inch lines)
- Tian zi ge (田字格) paper
- Copperplate calligraphy guide sheets (55° slant)
- Hindi writing practice paper
- Mi zi ge (米字格) paper
- Preschool writing paper (1 1/4 inch lines)
- Second grade writing paper (5/8 inch lines)
Frequently asked questions
What size guide lines do I need for brush lettering?
It depends on the pen. Large brush pens with a long, flexible tip are usually practised at an x-height of around 12–15 mm, which is what this sheet gives (14 mm). Fine-tip brush pens feel better on smaller sets, so the 20 mm variation halves to a 10 mm x-height.
Why is the middle zone shaded?
In brush lettering most of the visual weight sits in the x-height, where the thick downstrokes of a, n and o live. The pale tint lets you see at a glance whether your bowls fill the band evenly. It is light enough to write over without fighting the ink colour.
Will brush pens bleed through printer paper?
Water-based brush pens tend to feather and fray their tips on rough copier paper. A smooth, coated or laser paper of 100–120 g/m² (27–32 lb) behaves better. Many letterers print one sheet and use it as a guide underneath semi-transparent marker paper.
How many lines fit on a landscape sheet?
Five sets on Letter or A4 in landscape, against six on portrait Letter and seven on portrait A4. Each line is wider, about 25 cm on Letter, which is long enough for a two-word phrase at full size.
Can I use these sheets on an iPad?
Yes. Export a PNG or PDF and import it as a background or template layer in your drawing app. Use the 300 dpi PNG for sharp lines at full zoom, and choose the transparent option if you want to place it over another layer.
Last updated · About us