What prints with the starting settings
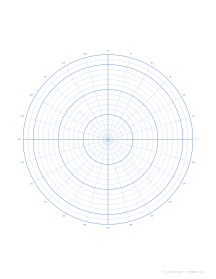
| Paper | US Letter — 215.9 × 279.4 mm (8.5 × 11 in) |
|---|---|
| Ring spacing | 5 mm = 0.197″ |
| Rings | 17 |
| Rays | every 15° |
| Margins | 1/2″ |
| Line weight | 0.18 mm (bold 0.35 mm) |
| Print setting | Scale 100% / Actual size |
Standard ring spacing
| Ring spacing | Millimetres | Inches | Per inch | Grid on Letter | Grid on A4 |
|---|---|---|---|---|---|
| 5 mm | 5 mm | 0.197″ | 5.08 | 38 × 50 | 38 × 55 |
| 10 mm | 10 mm | 0.394″ | 2.54 | 19 × 25 | 19 × 27 |
| 15 mm | 15 mm | 0.591″ | 1.69 | 12 × 16 | 12 × 18 |
| 1/4″ | 6.35 mm | 0.25″ | 4 | 30 × 40 | 29 × 43 |
| 1/2″ | 12.7 mm | 0.5″ | 2 | 15 × 20 | 14 × 21 |
What polar graph paper is for
Square graph paper is built for x and y. Polar graph paper is built for distance and direction. Its rings mark equal steps out from the center, and its rays mark equal turns around it, so anything described by an angle and a radius can be plotted directly.
Precalculus and calculus students use it to graph polar equations: cardioids, rose curves, limaçons, spirals and lemniscates all appear naturally on a polar grid. Physics and engineering students plot antenna radiation patterns, microphone pickup patterns and vector directions. Navigators and surveyors sketch bearings around a point. Artists and crafters use it for mandalas, rose windows, quilting circles, embroidery hoops and clock faces, where equal divisions of a circle are the whole point.
Choosing rings, rays and labels
Ring spacing sets the scale of r. 5 mm rings give 17 rings on Letter or A4, a good balance between range and readability. Use 10 mm or 1/2 inch rings for younger students or for large, simple curves, and 1/4 inch if you want inch-based radii.
Ray angle sets the resolution of θ. The choices are 5°, 10°, 15°, 30° and 45°:
| Ray every | Rays around the circle | Good for |
|---|---|---|
| 5° | 72 | Precise plotting, compass bearings, wind roses |
| 10° | 36 | Data plots and general-purpose design |
| 15° | 24 | Polar equations in degrees or radians (default) |
| 30° | 12 | Clock faces, quick sketches, unit circle drills |
| 45° | 8 | Simple radial designs and young learners |
Labels can show degrees (0° to 345° counterclockwise from the right-hand axis), radians as multiples of π, or nothing at all.
Tips for plotting polar curves
- Make a small table of θ and r values first, using every ray on the page. With 15° rays you have 24 points around a full turn, enough to see the shape of most curves.
- Negative r values plot on the opposite side of the pole: go to angle θ, then measure backward through the center.
- Mark each plotted point lightly, then join them with a smooth curve rather than straight segments.
- For rose curves r = a cos nθ, count the petals as you plot to check your work: n petals when n is odd, 2n when n is even.
Setting it up in the generator
Choose Polar graph paper as the paper type and your paper size. Set the ring spacing using a millimeter or inch preset, or type a custom value. Pick the ray angle and label style, and choose how often rings should be bold. The grid is always centered in the printable area and sized to its shorter side.
From Advanced options you can recolor the lines, add a title or header fields for worksheets, and set several pages for a problem set. Landscape orientation makes no difference to the circle itself, since it always fits the shorter side, but it leaves a strip beside the grid for a table of values.
Printing tips
Print at Actual size. Polar plots depend on the rings being true circles: if your printer scales width and height differently, circles become ellipses and angles drift. Measure the diameter of the outermost ring horizontally and vertically; the two numbers should match. If they don’t, run the printer calibration, which corrects each direction separately.
Printing the grid in a light color, with bold axes in a darker shade, makes your plotted curve the most visible thing on the page. If you are plotting several curves on one grid for comparison, draw each in a different colored pencil and add a small key in the corner.
Popular polar graph paper sheets
Frequently asked questions
What is polar graph paper?
Paper ruled with concentric circles around a central point (the pole) and straight rays radiating from it at equal angles. A point is located by its distance from the center, r, and its angle from the horizontal axis, θ, rather than by x and y coordinates as on square graph paper.
How many rings fit on a page?
With the default 5 mm ring spacing, a Letter or A4 page holds 17 rings, with every fifth ring drawn bolder so you can count radii quickly. At 10 mm spacing you get 8 rings. The circle is sized to the shorter side of the printable area, leaving room for the angle labels.
Should I label angles in degrees or radians?
Use degrees for geometry, navigation, antenna patterns and design work. Use radians for precalculus and calculus, where polar equations like r = 2 sin 3θ are usually written in radians. Radian labels print as fractions of π, such as π/6, π/4 and 2π/3. The radians page is set up for math classes.
What ray spacing should I pick?
15° is the default: every ray is a multiple of π/12, so the familiar marks π/6, π/4 and π/3 all fall on a line. 30° or 45° gives a cleaner page for quick sketches. 5° or 10° suits precise plotting, compass work and data such as wind directions, at the cost of a busier grid near the center.
How do I plot a point on polar graph paper?
Find the angle first: follow the ray for your angle, measured counterclockwise from 0° on the right. Then count rings out from the center to your radius. A point like (3, 60°) sits where the third ring crosses the 60° ray; for 50°, estimate one third of the way from the 45° ray to the 60° ray.
Can I use it for compass bearings?
Yes, with care: navigation bearings start at north and run clockwise, while math labels start on the right and run counterclockwise. Turn the sheet a quarter turn and relabel, or print with labels off and write your own.
Can I print polar paper without any labels?
Yes. Set Angle labels to None. The grid then grows slightly to use the space the labels occupied, which is useful for mandala designs, dartboard-style charts and other drawings where printed numbers would get in the way.
Which lines are drawn bolder?
The rays at 0°, 90°, 180° and 270° are drawn as bold axes, and rings are bold at the interval you set under Bold ring every (5 by default) plus the outermost ring. Set it to 0 if you prefer all rings the same weight.
Last updated · About us