The two ideas behind all perspective
The horizon line is the viewer’s eye level, drawn as a horizontal line across the page. Everything above it is seen from below and everything below it from above.
Vanishing points sit on the horizon. Parallel lines that recede away from the viewer, like the edges of a road or the top and bottom of a wall, appear to meet at a vanishing point. How many vanishing points you use depends on how the objects are turned relative to the viewer.
One-point perspective
Use one-point perspective when you look straight at the front of something: down a road, a corridor or a railway line, or straight into a room.
- Draw the horizon line and put one vanishing point on it.
- Draw the front face of a box as a plain rectangle; horizontals stay horizontal and verticals stay vertical.
- Draw lines from each corner of the rectangle to the vanishing point.
- Decide how deep the box is and draw the back edges parallel to the front ones.
The classic exercise is a room interior: the back wall is a rectangle, and the floor, ceiling and side walls are made by lines running from its corners outward through the vanishing point.
Two-point perspective
Use two-point perspective when you see an object from a corner, like the edge of a building or a box turned at an angle.
- Place two vanishing points on the horizon, well apart.
- Draw the nearest vertical edge of the box.
- From its top and bottom, draw lines to both vanishing points.
- Add two more verticals to set the width of each side, then join their tops and bottoms to the opposite vanishing points to find the back corners.
Verticals stay vertical. If the box looks distorted, move the vanishing points further apart; they often belong beyond the edges of the paper.
How far apart should the vanishing points be?
This is the question behind most “my box looks wrong” drawings, and it has a geometric answer. Vanishing points that are close together mean the viewer is standing very close to the object, closer than our eyes can take in comfortably. Artists keep subjects inside a cone of vision of about 60°; outside it, a perspective drawing starts to look stretched.
For a box turned 45° to you, the two vanishing points sit exactly twice the viewing distance apart, so the angle the box fills depends only on how far apart they are compared with the box’s width:
| Distance between the two vanishing points | Angle the object fills | Result |
|---|---|---|
| 1× the object's width | 90° | Distorted |
| 1.25× the object's width | 77° | Distorted |
| 1.5× the object's width | 67° | Distorted |
| 1.75× the object's width | 59° | Lively, wide-angle |
| 2× the object's width | 53° | Lively, wide-angle |
| 3× the object's width | 37° | Calm, natural |
| 4× the object's width | 28° | Calm, natural |
So the working rule is: keep the vanishing points at least about 1.75 times the width of the object apart, and three or four times for a calm, natural look. On a letter-size page that often puts them off the paper, which is why perspective grids and large sheets help.
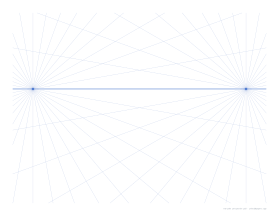
Our two-point grid puts its vanishing points 84% of the drawing area apart. By the rule above, a box up to about half the page wide stays inside the 60° cone, so draw your main subject no wider than that and keep it near the middle.
- VPs 1.4× the cube's width apart71° of view: stretched, the near corner too sharp
- VPs 1.7× the cube's width apart60° of view, the edge of the cone
- VPs 3.5× the cube's width apart32° of view: natural
Three-point perspective
Add a third vanishing point above or below the horizon when the verticals should also converge: a skyscraper seen from the street (third point high above) or a city seen from a tower (third point far below). It is dramatic and harder to control; practise one and two points first.
| Type | Vanishing points | Verticals | Typical subjects |
|---|---|---|---|
| One-point | 1 on the horizon | parallel | roads, corridors, room interiors |
| Two-point | 2 on the horizon | parallel | buildings from a corner, furniture |
| Three-point | 2 on the horizon + 1 above or below | converge | tall buildings, aerial views |
Practising on perspective grids
- One-pointone vanishing point, with horizontals and verticals
- Two-pointtwo vanishing points on the horizon
- Three-pointa third point below for looking down
A perspective grid prints the horizon and fans of lines from each vanishing point, so you can sketch boxes, streets and rooms that sit correctly without measuring every line. Draw lightly over the grid in pencil, then ink your final lines and erase or scan without the guides. Change the number of points and the height of the horizon in the generator to match the view you want.
Good exercises: a row of boxes at different heights in one-point; a street corner in two-point; a box seen from far above in three-point. Sketch small and fast first using thumbnail sheets, then pick the best composition to draw large.
Common mistakes
- Vanishing points too close. Causes stretched, warped boxes. Spread them out.
- Several horizons in one drawing. One scene, one eye level, one horizon.
- Tilted verticals in one- and two-point. Verticals stay vertical unless you are using three points.
- Circles drawn as circles. A circle in perspective is an ellipse; fit it inside a square drawn in perspective.