What isometric drawing is
An isometric drawing is a way of showing a three-dimensional object on flat paper so that its width, depth and height are all visible and all measured at the same scale. It is used in engineering sketches, assembly instructions, architecture, pixel art, video games and puzzles.
The word means “equal measure”. In an isometric view, the three main directions of the object are drawn along three axes spaced 120° apart. One axis is vertical; the other two slope away at 30° above the horizontal, one to the left and one to the right. Because all three axes are treated the same way, a length measured along any of them is drawn at the same scale.
This is different from perspective drawing, where parallel lines converge toward vanishing points and distant objects look smaller. In isometric, parallel edges stay parallel and nothing shrinks with distance. The result looks slightly mechanical, but it is easy to draw accurately and easy to measure from.
Isometric drawing vs isometric projection
Strictly, a mathematical isometric projection foreshortens every axis to about 82% of true length. In practice almost everyone draws at full size along the axes instead, which is called an isometric drawing. The shape is the same, just a little larger, and you can measure lengths straight off the grid. That is the approach used on isometric paper and throughout this guide.
Reading isometric paper
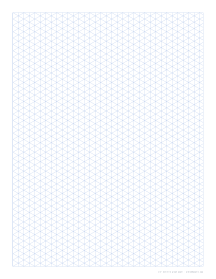
Isometric paper is a grid of equilateral triangles. With lines, it has three sets: one vertical and two at 30° to the horizontal, exactly the three isometric axes. Every edge of a box drawn on it follows one of those lines.
With dots, the paper shows only the corners of the triangles. Dots sit in vertical columns, and each dot has six neighbours at equal distances.
The size of the grid is given by the triangle side, the length of one edge of a triangle, which is also the distance between neighbouring dots. In the generator you can pick 5 mm, 1/4 inch, 1 cm or any custom value. Each step along a grid line is one unit of measurement.
- Linesall three axes drawn
- No vertical linesa diamond grid for tile maps
- Dotsonly the triangle corners
Drawing a cube
The cube is the building block of everything else. Here is the method on line paper:
- Pick a front corner. Choose a grid point near the middle of the sheet. This is the corner nearest to you, at the bottom of the cube.
- Draw the vertical edge. Count up three units along the vertical line and draw the front edge.
- Draw the two bottom edges. From the starting point, draw three units along the left-slanting 30° line and three units along the right-slanting line.
- Draw the side verticals. From the end of each bottom edge, draw a vertical line three units up. You now have two visible faces.
- Close the top. From the top of each vertical, draw lines parallel to the bottom edges until they meet. The top face is a diamond shape: a rhombus with 60° and 120° angles.
Only three faces of a cube are visible in isometric view: the top, the left and the right. Shading each face differently (for example light top, medium left, dark right) makes the shape read instantly as solid.
From cubes to anything
Once the cube is comfortable, more complex shapes are mostly boxes with pieces added or removed:
- Rectangular blocks: use different counts along each axis, such as 4 wide, 2 deep, 3 tall.
- Steps and L-shapes: draw the overall box lightly, then cut notches by stepping along the grid.
- Sloped surfaces: find both ends of the slope on the grid and join them with a straight line. Sloped lines don’t follow any grid direction, and they are not drawn at true length.
A useful habit is to draw an enclosing box first in light pencil, then carve the object out of it, inking only the final edges.
Circles become ellipses
A circle drawn on the top, left or right face of a box appears as an ellipse. Its short axis is 0.58 of the long axis (the ratio 1 : √3), and the long axis always runs along the longer diagonal of the rhombus-shaped face. Because an isometric drawing uses full size along the axes, the ellipse comes out bigger than the circle: its long axis is 1.22 times the circle’s diameter. Commercial isometric ellipse templates are marked 35° (more precisely 35°16′) for this reason.
Without a template, the four-centre method gives a good approximation:
- Draw the isometric square (the rhombus) that the circle sits in. Its side equals the circle’s diameter.
- Mark the midpoint of each side.
- From each of the two obtuse corners (the 120° ones), draw a line to the midpoints of the two opposite sides.
- These lines cross at two points inside the rhombus. Those are the centres for the two small arcs; the obtuse corners are the centres for the two large arcs.
- Draw the four arcs with a compass, each running between two neighbouring midpoints.
- Exact ellipse
- Four-centre compass method
- Construction lines from the 120° corners
How close is it? We computed both curves exactly:
| For a circle of diameter D | Exact ellipse | Four-centre method | Difference |
|---|---|---|---|
| Long axis | 1.225 D | 1.155 D | −5.7% |
| Short axis | 0.707 D | 0.732 D | +3.5% |
| Short ÷ long | 0.577 | 0.634 | – |
The compass method is about 6% short along the long axis and 4% full across the short one. That is invisible in a sketch, but it shows if you fit a printed ellipse template or a drawn cylinder against parts made to size; use an isometric ellipse template marked 35°16′ when it matters.
A cylinder is two ellipses, top and bottom, joined by vertical lines at the ends of the long axis. A hole through a block is drawn the same way, showing only the part of the back ellipse that is visible.
Dots or lines?
| Line paper | Dot paper | |
|---|---|---|
| Learning | Easier: every axis is drawn | Takes more counting |
| Finished look | Grid stays visible | Clean, almost blank |
| Technical sketches | Best choice | Fine for simple parts |
| Illustration and inking | Grid can compete with artwork | Dots disappear under ink |
| Pixel-art style and game maps | Helpful for tiles | Popular for final art |
On line paper, the generator’s Vertical lines option can be turned off, leaving only the two 30° sets. That makes a diamond grid that some people prefer for tile-based game maps, though vertical guides are helpful for most drawing. Try our isometric dot paper when you want the grid to step back.
Tips for better results
- Use a light line colour. Pale grey or blue lines let pencil and ink stand out, and they photocopy faintly.
- Ink only visible edges. Hidden edges are normally left out in isometric drawings, unlike some orthographic views.
- Keep a consistent light direction. Decide where the light comes from before shading and stick to it.
- Print at actual size if you are measuring off the grid. Fit to page shrinks a 5 mm triangle slightly, which matters for scale drawings and not much for illustration.
- Go bigger for presentations. A3 or Tabloid sheets give space for room layouts and multi-part assemblies.
Isometric paper also pairs well with hexagonal paper: a hexagon is what a cube’s outline looks like in isometric view, which is why so many isometric game boards look like hex maps.