Why the grid method works
Copying a whole picture freehand asks your brain to judge dozens of distances and angles at once, and small errors add up: an eye a little too high, a chin a little too long. The grid method replaces one hard problem with many easy ones. Inside each small square you only need to place a few lines relative to the square’s edges, which almost anyone can do accurately. Because both grids have the same number of squares, the errors cannot accumulate across the picture.
The method is ancient. Egyptian artists squared their walls at least 5,000 years ago, partly to keep human figures in fixed proportions, and Renaissance painters squared small sketches to transfer them onto walls and canvases. Museums still find the faint grid lines under finished works.
What you need
- A reference image with a grid on it. You can draw lines on a printout, or use add grid to image, which overlays a labelled grid on your photo without uploading it.
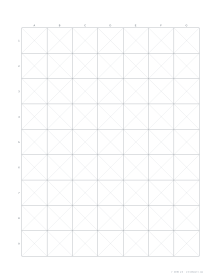
- Paper with a matching grid, either drawn lightly by hand or printed. Grid drawing paper prints squares from 5 mm to 2 inches with letters and numbers on the edges.
- A hard pencil (2H or H) for the grid, a softer one (HB to 2B) for the drawing, and a kneaded eraser.
Step by step
- Choose the number of squares. Count squares across the reference. Six to eight is plenty for simple shapes; 12 to 20 for portraits. More squares mean more accuracy but more grid to draw.
- Decide the drawing size. Divide the drawing width by the number of squares to get the square size on your paper. The proportion calculator does this, and also tells you the height.
- Draw or print the matching grid. Label columns with letters and rows with numbers on both grids, so you can find square C4 on the photo and its twin on the paper instantly.
- Mark crossing points. In each square, mark where the main lines of the picture cross the square’s edges. These dots are your skeleton.
- Join the marks. Connect the dots square by square, looking only at the shapes inside each square rather than at “the eye” or “the hand”.
- Check whole rows and columns. Every so often, compare a full row of squares with the reference to catch drift.
- Erase the grid in stages as you add shading, so you never lose your place.
- Reference4 × 5 squares of 3 cm, labelled
- Step 4: crossing pointsthe same grid at 6 cm squares: 14 points where the lines cross the grid
- Step 5: join square by squarerows 1 to 3 joined; the rest still dots
Diagonals for portraits
Faces are unforgiving: a millimetre’s difference in the corner of a mouth changes the expression. Adding diagonals divides each square into four triangles, giving extra reference points without doubling the number of squares. Use them in the areas that matter (eyes, nose, mouth) and leave the background with plain squares.
- Plain 1 in squaresletters across, numbers down
- With diagonalsfour triangles per square
How many squares fit on a page?
Our grid drawing paper labels the squares and prints them at exact size. This is how many fit on one sheet:
| Paper | 1 cm | 1/2 in | 2 cm | 1 in | 2 in |
|---|---|---|---|---|---|
| US Letter | 18 × 24 | 14 × 19 | 9 × 12 | 7 × 9 | 3 × 4 |
| A4 | 18 × 27 | 14 × 21 | 9 × 13 | 7 × 10 | 3 × 5 |
For a portrait with 12 squares across on a single sheet, 1/2 inch or 1 cm squares fit; for a bigger drawing, tape sheets together or draw the grid on larger paper at the square size the proportion calculator gives.
Enlarging and reducing
The grid method is also the classic way to scale a picture. A 6 × 4 inch photo with six squares across has one-inch squares; to draw it 30 inches wide, draw six five-inch squares across. Murals, signs and painted furniture are planned exactly this way. For very large work, snap chalk lines or use a long straight edge and a level.
| Reference width | Squares across | Drawing width | Drawing square |
|---|---|---|---|
| 6 in | 6 | 12 in | 2 in |
| 15 cm | 10 | 30 cm | 3 cm |
| 10 in | 8 | 40 in | 5 in |
Common mistakes
- Mismatched grids. If the reference has 8 × 6 squares, the drawing must too. Count twice before drawing.
- Drawing the grid too dark. It will show through light shading. Use the lightest line you can see.
- Copying symbols instead of shapes. Draw the shape you see in each square, not the idea of an eye. Turning both the reference and the drawing upside down helps.
- Skipping the check. Squares can each be right while a whole row is shifted. Compare long lines across several squares.
When to stop using grids
Many artists use the grid method as training wheels: after a few dozen drawings, your eye learns to judge proportions and you need fewer squares, then just a few guide lines, then none. Others keep using grids for commissions and murals because accuracy matters more than speed. Either way, it is a tool, not a crutch.