Variations
What prints with the starting settings
| Paper | US Letter — 215.9 × 279.4 mm (8.5 × 11 in) |
|---|---|
| Ring spacing | 5 mm = 0.197″ |
| Rings | 17 |
| Rays | every 15° |
| Margins | 1/2″ |
| Line weight | 0.18 mm (bold 0.35 mm) |
| Print setting | Scale 100% / Actual size |
A grid that speaks the language of calculus
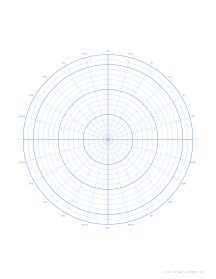
Once a course switches to radians, plotting on a degree grid means converting every angle in your head. This sheet removes that step. Each ray is labelled as a fraction of π, starting at 0 on the right and running counterclockwise: π/12, π/6, π/4, π/3, 5π/12, π/2 at the top, π on the left, 3π/2 at the bottom, and round to 23π/12. Every value on the standard unit circle has its own ray, and the four axes are bold.
Rings are 5 mm apart with a heavier ring every 25 mm. Choose your own radial scale and write it at the edge, for example one ring = 0.5 units for a curve whose radius never exceeds 8.
Curves that suit it
- Limaçons and cardioids such as r = 1 + 2 cos θ: plot a value every π/12 and the inner loop appears naturally.
- Rose curves such as r = 3 sin(3θ): the three petal tips fall exactly on the π/6, 5π/6 and 3π/2 rays, and the π/12 rays in between trace each petal’s sides.
- Spirals such as r = θ: each full turn moves 2π units outward, so with one ring = π/4 two complete turns fit on the page.
- Area between curves: shade the region and use the rays to read off the limits of integration.
The π/6 variation suits homework sets that stay with multiples of 30°. π/4 is useful when you are checking the general shape of a graph rather than reading values. Switch to 1 cm rings when your radial values are small whole numbers and you want one ring per unit.
Reading a curve back off the page
Radian labels also help in reverse. Given a sketched rose or cardioid, you can read where it meets the origin or reaches its maximum directly as a fraction of π, and use those values as integration limits or to check symmetry. Mark the values in pencil beside the outer ring as you find them, so the working stays on the graph.
Printing and checking
Print at Actual size. Each ring should be exactly 5 mm from the next; from the centre to the outer edge of the grid is 85 mm. The labels are small sans-serif text printed just outside the outer ring, so give the sheet a moment to dry on an inkjet before writing near them.
Frequently asked questions
What angles are labelled on radian polar paper?
Every ray from 0 around to 23π/12, in steps of π/12: π/12, π/6, π/4, π/3, 5π/12, π/2, and so on. Fractions are shown in lowest terms, so 30° appears as π/6 rather than 2π/12.
Should I use radians or degrees for polar graphs?
If the equation comes from a calculus or precalculus course, such as r = 2 + 3 cos θ, use radians; the textbook's tables and answers will be in radians too. For geometry, navigation-style problems or anything given in degrees, the degree version is easier.
How do I plot a negative radius?
Find the angle's ray, then go through the centre and out the same distance on the opposite side, which is the ray at θ + π. For example, (−2, π/6) is plotted two units out along the 7π/6 ray.
How many rings are on this paper?
17 rings 5 mm apart on Letter or A4, with every fifth ring bold. The 1 cm variation has eight rings, each a convenient whole unit.
Which spacing of rays should I pick?
π/12 covers every angle in the standard unit-circle table, which makes it the best all-round choice. π/6 is cleaner when a problem only uses multiples of 30°, and π/4 suits quick sketches where you care about shape more than exact values.
Last updated · About us