Why printed rulers go wrong
A PDF ruler is drawn at exact physical sizes, but two things can change them on the way to paper:
- Scaling in the print dialog. Fit to page, Shrink oversized pages and some printer defaults shrink the whole page so it fits inside the printer’s unprintable edge. That puts it at about 94 to 97% of its real size, and the error grows along the ruler:
- Mechanical error. Even at 100%, paper feed rollers are not perfect. Most home printers are within about half a percent, but some are off by a full percent, often slightly differently across and down the page.
The first is fixed by a setting; the second by calibration. Our print at actual size guide has the setting for every common app.
Printing a ruler you can trust
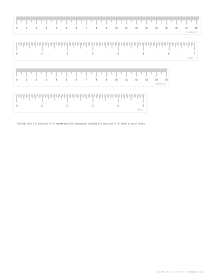
- The printable ruler, first 11 cmmm ticks with longer 5 mm and 10 mm marks, then an inch scale in 1/16 in
- Open the printable ruler and download the PDF. It has two centimetre and two inch scales, each with a dashed cutting line.
- In the print dialog, set Scale: 100% or Actual size, and turn off any “fit” option.
- Print on ordinary paper, or on card for a sturdier ruler.
- Check it. Lay a bank card along the centimetre scale with one end at 0: its long edge should reach 85.6 mm, about 3 3/8 inches. If you have a reliable ruler, compare at 10 cm and 4 in instead, as the sheet suggests.
- If it is consistently off, run the calibration wizard once. Every PDF you download afterwards is corrected for that printer.
Ring size chart
Ring sizes measure the inside of the ring. The US and Canada use numbers, the UK and Australia use letters, and most of Europe uses the ISO system, where the size is the inner circumference in millimetres. The diameters below come from the same formula our ring sizer is drawn with: 11.63 mm plus 0.8128 mm for each US size, which is 0.032 inch per size.
| US / Canada | Inner diameter | Inner circumference (ISO size) | UK / Australia |
|---|---|---|---|
| 3 | 14.1 mm | 44.2 mm | – |
| 4 | 14.9 mm | 46.8 mm | H |
| 5 | 15.7 mm | 49.3 mm | J½ |
| 6 | 16.5 mm | 51.9 mm | L½ |
| 7 | 17.3 mm | 54.4 mm | N½ |
| 8 | 18.1 mm | 57.0 mm | P½ |
| 9 | 18.9 mm | 59.5 mm | R½ |
| 10 | 19.8 mm | 62.1 mm | T½ |
| 11 | 20.6 mm | 64.6 mm | V½ |
| 12 | 21.4 mm | 67.2 mm | X½ |
| 13 | 22.2 mm | 69.7 mm | – |
Each whole US size adds 0.81 mm to the diameter and about 2.55 mm to the circumference, or two UK letters. The UK letters are from the equivalency table on Wikipedia; they don’t follow an exact formula, so check a UK jeweller’s own chart for half sizes.
Why print scale matters even more for rings
A ring that is half a size too small won’t go on. A scaled printout pushes you the wrong way: a shrunk circle or strip makes your finger look bigger than it is, so you would order a ring that is too loose.
| Your real size | Printed at 97%, you would read | Printed at 96%, you would read | Printed at 94%, you would read |
|---|---|---|---|
| 5 | 5.6(+0.6) | 5.8(+0.8) | 6.2(+1.2) |
| 7 | 7.7(+0.7) | 7.9(+0.9) | 8.4(+1.4) |
| 9 | 9.7(+0.7) | 10.0(+1.0) | 10.5(+1.5) |
So the 100% setting matters more here than anywhere else. Measure one of the printed circles with a ruler before you use it: the size 7 circle should be 17.3 mm across.
Measuring ring size
- The ring sizer sheeta cut-out strip in US sizes 3 to 14 with half-size ticks, then circles for sizes 3 to 13
Method 1: a ring you already own
This is the most reliable. Print the ring sizer, place a ring that fits the right finger on the circles, and find the circle that matches the inside edge of the band exactly. If it falls between two sizes, choose the larger.
Method 2: the paper strip
- Cut out the printed strip along its outline, and cut the short slit on the red line.
- Wrap it around the base of your finger with the numbers outside, push the pointed end through the slit and pull until it is snug but would still slide over the knuckle.
- Read the US size at the slit. Whole sizes are 2.55 mm apart on the strip, so the odd and even numbers sit on two rows.
A paper strip is easy to pull too tight, so take two or three readings and use the one that would still pass over your knuckle.
Getting a reading you can trust
- Measure late in the day, when fingers are at their largest, and never with cold hands.
- Measure the right finger. Fingers on your dominant hand are often slightly larger.
- Allow for wide bands. A wide band touches more of the finger and feels tighter, so sellers commonly suggest going up about half a size for bands of 6 mm or more. Comfort-fit bands with a rounded inside can run looser, so check the seller’s own advice.
Other things you can measure
A printer set to 100%, and ideally calibrated, can also print accurate templates for sewing, quilting, EPP templates, model making and drawing grids. The same check applies: measure one known distance on the printout before you cut or sew.